


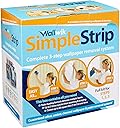
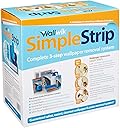
Simple Strip Small Project Wallpaper removal Kit
Product ID: 67796170
Review: The best wallpaper removal method for difficult jobs - The idiots who wallpapered every single room in our house put it up directly over unsealed drywall, and in some rooms wallpapered up to three layers deep. I've tried more than a dozen methods of removing the old wallpaper, and WallWik is the only product I've gone back to for more. It takes a lot of patience, and a thorough soaking, but with this product, I can get get the wallpaper off, without tearing up the walls. With some of the other methods, the paper backing on the drywall came off with the wall paper, sometimes taking bits of drywall with it, and we had to patch and sand the walls before they could be painted. That took a lot of extra time and effort and put us behind schedule, so I'll never use anything but WallWik again. I've used this product for three different types of wallpaper removal: 1. In the one bedroom where wallpaper was put up over a couple of coats of paint, the wallpaper came off in nearly whole sheets. I was amazed at how fast and easy the job was. 2. In the one bedroom with three layers of wallpaper (plus border), I got about a layer and a half off with the first treatment - mostly large chunks, and some sheets with hangers on. I had to re-score and start again to get the remaining layers off, but it worked and I only scuffed the walls with the skimmer/scraper in a couple of places (and that was due more to trying to hurry while fatigued than a flaw in the system). 3. In the basement, hallways and bathrooms, wallpaper was put up over naked drywall, without even the benefit of a skim coat (someone really needs to be smacked for that). This was the most difficult and the messiest removal. I was lucky to get some of it off in large chunks - mostly it came off in small pieces - sometimes leaving part of the paste and backing behind. It required extra soaking time and liberal use of the spray directly on the wall (without the sheets) to remove the remaining residue and backing. It was much wetter work than the two bedrooms I did. The bathroom I most recently finished was part of a structural remodel and I had a contractor doing the heavy work. I got all the wallpaper removed without damaging the walls (much to my contractor's surprise), but the walls were still too damp the following morning to prep and paint. So plan on 24-36 hours of dry time, if you've got the same type of job. I think the work would have gone more quickly if I'd had a helper for the larger rooms, but it's absolutely doable as solo project. The only thing I don't love about the WallWik system is their scorer. It's OK and will get the job done, but I prefer the Zinsser 2976 PaperTiger Scoring Tool for Wallpaper Removal Triple Head Review: Great system - This is an easy system to use and it worked pretty well. I used it on four rooms. The 'papers' stick really well, EXCEPT on textured wallpaper. For that, I had to leave it on longer, make sure it was really wet, and press quite firmly to get it adhere. The system is messy, since you don't wring out the 'papers' before you press them to the wallpaper, so be sure to protect surfaces that could be damaged by the moisture. The spray bottle works very well, and sometimes I didn't take the time to mix the solution with water, using just warm water alone. I used a two gallon bucket for my removal. That amount did two of my rooms and I did that over the span of 3 or 4 days, so by the 2nd day the water was cold. It still worked well. A week later, I used another bucket full for the final two rooms, which also took multiple days. Each night, I flattened out the papers and laid them on the edge of a tub OR, draped them over the rungs of my metal ladder. By morning, they were completely dry. They are so sturdy, you can use them again and again and again. I had a helper part of the time, but most of the time I worked alone and didn't have any problems. The Zinsser 2966 Paper Tiger Scoring Tool worked better than the scoring tool included with this kit, but it came in handy when I had someone help me with the scoring - two people sped up the process.
| Manufacturer | Wallwik |
| Item Weight | 5.54 pounds |
| Package Dimensions | 12.5 x 12.3 x 7.9 inches |
| Is Discontinued By Manufacturer | No |
| Item Package Quantity | 1 |
| Batteries Included? | No |
| Batteries Required? | No |
J**A
The best wallpaper removal method for difficult jobs
The idiots who wallpapered every single room in our house put it up directly over unsealed drywall, and in some rooms wallpapered up to three layers deep. I've tried more than a dozen methods of removing the old wallpaper, and WallWik is the only product I've gone back to for more. It takes a lot of patience, and a thorough soaking, but with this product, I can get get the wallpaper off, without tearing up the walls. With some of the other methods, the paper backing on the drywall came off with the wall paper, sometimes taking bits of drywall with it, and we had to patch and sand the walls before they could be painted. That took a lot of extra time and effort and put us behind schedule, so I'll never use anything but WallWik again. I've used this product for three different types of wallpaper removal: 1. In the one bedroom where wallpaper was put up over a couple of coats of paint, the wallpaper came off in nearly whole sheets. I was amazed at how fast and easy the job was. 2. In the one bedroom with three layers of wallpaper (plus border), I got about a layer and a half off with the first treatment - mostly large chunks, and some sheets with hangers on. I had to re-score and start again to get the remaining layers off, but it worked and I only scuffed the walls with the skimmer/scraper in a couple of places (and that was due more to trying to hurry while fatigued than a flaw in the system). 3. In the basement, hallways and bathrooms, wallpaper was put up over naked drywall, without even the benefit of a skim coat (someone really needs to be smacked for that). This was the most difficult and the messiest removal. I was lucky to get some of it off in large chunks - mostly it came off in small pieces - sometimes leaving part of the paste and backing behind. It required extra soaking time and liberal use of the spray directly on the wall (without the sheets) to remove the remaining residue and backing. It was much wetter work than the two bedrooms I did. The bathroom I most recently finished was part of a structural remodel and I had a contractor doing the heavy work. I got all the wallpaper removed without damaging the walls (much to my contractor's surprise), but the walls were still too damp the following morning to prep and paint. So plan on 24-36 hours of dry time, if you've got the same type of job. I think the work would have gone more quickly if I'd had a helper for the larger rooms, but it's absolutely doable as solo project. The only thing I don't love about the WallWik system is their scorer. It's OK and will get the job done, but I prefer the Zinsser 2976 PaperTiger Scoring Tool for Wallpaper Removal Triple Head
W**F
Great system
This is an easy system to use and it worked pretty well. I used it on four rooms. The 'papers' stick really well, EXCEPT on textured wallpaper. For that, I had to leave it on longer, make sure it was really wet, and press quite firmly to get it adhere. The system is messy, since you don't wring out the 'papers' before you press them to the wallpaper, so be sure to protect surfaces that could be damaged by the moisture. The spray bottle works very well, and sometimes I didn't take the time to mix the solution with water, using just warm water alone. I used a two gallon bucket for my removal. That amount did two of my rooms and I did that over the span of 3 or 4 days, so by the 2nd day the water was cold. It still worked well. A week later, I used another bucket full for the final two rooms, which also took multiple days. Each night, I flattened out the papers and laid them on the edge of a tub OR, draped them over the rungs of my metal ladder. By morning, they were completely dry. They are so sturdy, you can use them again and again and again. I had a helper part of the time, but most of the time I worked alone and didn't have any problems. The Zinsser 2966 Paper Tiger Scoring Tool worked better than the scoring tool included with this kit, but it came in handy when I had someone help me with the scoring - two people sped up the process.
M**T
Best item for removal of wallpaper!
Best product I have ever used to remove wallpaper! Only thing I didn't use was the sprayer. I had two and three layers of wallpaper to remove with lots of extra glue on the back.The key is leaving the solution drenched sheets on the walls at least 30 minutes, Then the paper comes down fairly easilly. I had to work a little harder around the molding. I used a putty knife to start then pulled the paper, If there was some left I wet the sheets again but only leave them on for a short time as the sheetrock starts to get wet.The sheets you can cut to fit small areas. I also would rinse the sheets out and let them dry to be used agin the next day.
C**X
Works - but not as simple as they say
Bought this to remove OLD wallpaper in a bathroom. The scoring tool is not the best (does not really cut through the paper) and the actual sheets you use to "stick" to the wallpaper are a chore to get to stick. What we finally did was peel off the face of the wallpaper and stick the sheets directly to the underside. This worked great. Used the included tool to then scrap the gluelly mess off the wall. Had to wash down the wall numerous times to remove the stickiness but the wallpaper was gone. Planning to use it on the OLD wallpaper in the kitchen - hopefully we can peel away the face of the paper as we did in the bathroom and just stick the sheets to the underside again. (fingers crossed)
K**N
Works great!!
Here's what worked for me, ymmv. 1. Scored the wallpaper. I bought the Zinsser scoring tool with the 3 blades instead of the one that came with it. 2. Placed sheets on the wallpaper. I only used four sheets at a time. Yeah, sometimes they fell but as long as there was enough solution to the point where the sheet was dripping and I smoothed out the air bubbles, they stayed on the wall. 3. Let it sit for about 5 minutes. Directions said about 30 minutes but I didn't want to keeps spraying the walls to keep the sheets moist. 4. Peeled off the top layer (vinyl), which came off very easily. But bottom paper layer remained...it was lightly moist from the scoring and where the solution soaked through, but not as easy to peel. Maybe would have been soaked through enough if I left the sheets on for 30 minutes..? 5. Sprayed the paper till it was soaked through. Pressure sprayer worked great...I'm going to use it for plants. :-) Let it sit for a couple minutes. 6. Peeled off the paper using the scraper. Better than using a blade so that it doesn't mark the drywall. But sometimes I could use just my fingernails. It came off in large pieces. It was very easy, even my boyfriend was amazed that I was able to finish the bathroom all by myself. I am surprised at how easy it was to remove wallpaper....I thought I'd be sore and it would take an entire weekend. I liked this kit because everything was included including the sprayer.
M**H
does not work well
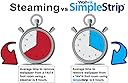
I followed the instructions and let it soak for over 90 minutes, making sure to keep it wet with the sprayer every 10 minutes. Did not work well in pulling off the wallpaper. I would just go with a steamer. It will save you time, and money in the long run.
A**N
Unbelievable!!! It really works!
I ordered this as a last resort. Next step would have been to call in a professional. No professional needed! This system WORKS! Wallpaper was placed on unprimed/unsealed walls in 1989 (thank you, original homeowners). When scored and steamed, small pieces would come down, along with chunks of drywall. But with this magnificent system, I was able to pull down entire sheets of wallpaper! Easily! Without damaging the drywall. It’s a one-person task that doesn’t require much effort. The most strenuous part is scoring the wallpaper. This is a purchase that you won’t regret. TIP: The Piranha wallpaper scoring tool is easier to work with than the scoring tool included with the Simple Strip system.
S**Y
Surprise! It actually works!
The punch line: Removing our wallpaper wasn't as easy as it looks on TV, but it definitely works! 5 stars! To give you an idea of what we were up against, we bought a house last fall with the most awful floral wallpaper you'd ever see. Most of it on the first floor came off without a problem. We started upstairs and encountered the most stubborn wallpaper I'd ever come across. It's a fairly thick vinyl wallpaper with a thick back. We were able to scrape the vinyl off with a scraper, but the backing would only come off in small (dime sized) pieces. Having dealt with stubborn wallpaper, I headed to the store for some DIF wallpaper remover. After using half the bottle and about four hours of work, I had removed bits and pieces off of one sheet of wallpaper. In frustration, we left the wall looking like a mountain lion was trapped in our hallway for three months. I happened to see the DIY TV episode that featured the WalWik system. Let me say that I was extremely skeptical; I couldn't find the product in stores, which made me think that it was some TV gimmick. But, I figured it was worth the price if it made the job any easier. I followed all the directions and waited for the sheets to dry. I was pleasantly surprised when, with a little bit of effort, the stubborn wallpaper backing started coming cleanly off the wall. The instructions note that 85% of wallpaper will come off in sheets just like on TV. 5%, however, may come off in little pieces. We're in that camp. However, it did come off cleanly, which was a major improvement over any other method we tried. I was able to remove three sheets of wallpaper in about an hour (including the wait time). The only real issue was that I had to scrape off the vinyl covering because the scorer wouldn't get all the way through to the wall. Still, it was a lot easier than scraping for hours with little success!
Trustpilot
1 month ago
1 month ago