


Buy anything from 5,000+ international stores. One checkout price. No surprise fees. Join 2M+ shoppers on Desertcart.
Desertcart purchases this item on your behalf and handles shipping, customs, and support to UAE.
🏡 Elevate your doorstep style with weatherproof confidence!
The VOUNOT Door Canopy (120x80cm) combines a 6mm thick polycarbonate sheet with a rust-resistant aluminum frame and ABS supports to deliver durable, all-weather protection. Designed for easy installation with included hardware, it shelters entrances from rain, snow, sun, and wind while adding a sleek, modern aesthetic to your home exterior.


| ASIN | B08R8JWGBQ |
| Best Sellers Rank | 41,272 in Home & Kitchen ( See Top 100 in Home & Kitchen ) 5 in Window Awnings & Canopies |
| Brand | VOUNOT |
| Brand Name | VOUNOT |
| Colour | Grey |
| Country Of Origin | China |
| Customer Reviews | 4.4 out of 5 stars 5,286 Reviews |
| Fabric Type | Polyester |
| Is Assembly Required? | Yes |
| Item Dimensions D x W x H | 80D x 120W x 23H centimetres |
| Item Type Name | Door Canopy |
| Item Weight | 2.6 Kilograms |
| Item weight | 2.6 Kilograms |
| Manufacturer | VOUNOT |
| Manufacturer Part Number | 4846369112087 |
| Material | Acrylonitrile Butadiene Styrene, Aluminium, Plastic, Polycarbonate |
| Material Type | Acrylonitrile Butadiene Styrene, Aluminium, Plastic, Polycarbonate |
| Model Number | 4846369112087 |
| Operation Mode | Manual |
| Pattern | Solid |
| Product dimensions | 80D x 120W x 23H centimetres |
| Projection Distance | 80 Centimeters |
| Size | 120x80 cm |
| Smart Home Compatibility | Not Smart Home Compatible |
| Style Name | classic |
| Unit Count | 1 Sztuka |
I**H
A good easy to install, fiddly to assemble, canopy great when fitted
This canopy is good value despite being all plastic construction the support frame is very rigid and light. Assembly is easy but here is the only problem I found especially if you don`t have an assistant to help you. I put up the centre support and assembled each of the end ones onto the perspex roof and secured them using the supplied screws in the ends, the plan was then to slide eachg side onto the already mounted centre support and secure in the holes I had already drilled, this was when the problem began. I bent the roofing material into the support but everytime I went to move the outer end it would pop back out again and again before I could secure the first bolt, so I took down the centre support assembled the whole canopy on the ground and drilled in 4 stainless steel self tapping screws (see photos) through the centre support to joint the two half together. After doing this the whole canopy was one piece and fairly strong, but a little bendy. I put the whole thing back up using the centre support first then each end in turn it was very easy once the canopy was in one and wasn`t constantly popping apart. Also the additional two screws I think will give added procetion to the joint in even the strongest of winds. The anchor bolts that come with it are sturdy but I was fixing into a timber structure so opted for coach bolts instead but the supplied fixings look like quality anchor bolts. As for strength well winter is coming and so will the winds I shall have to see how it fairs, that being said I think it will stand a pounding by strong winds - will let you know next summer. All in all for the price a sturdy, well made peice of kit. It is December now and we have had some 70mph plus gale force winds and the canopy has with stood them no problem at all.
H**O
Patio Door canopy that is very good quality and reasonably priced.
I am very impressed with this door canopy as it covers my patio doors and it was relatively easy to assemble too. I paid just under £60 and I believe it is very good value for money. It is very sturdy once installed properly on the wall with provided anchors. I used my Bosch GBH 2 26F SDS drill machine and Bosch Expert SDS 10mm bit and it was easy to drill into bricks. I did have a piece of wooden batten length leftover from my Trellis so I marked the holes on wood while the assembled canopy stayed on ground and then drilled through the wooden batten to create a template. Once all the holes lined up on Batten, it was easy to mark up the exact location of 6 holes needed to mount it on the wall. Used a mallet to drive the anchors in the wall starting from the middle bar of the canopy. I used my Amazon Umi Spanner rachet set to tighten the bolts. After that just put those plastic caps provided to hide the bolts. Job done in an hour not including the hour for assembly. So for two hours of DIY, I have a very stylish and sturdy canopy sheltering my patio doors from rain and snow, what more you want. I would definitely buy more for my windows in few weeks time.
M**R
Decent canopy, buy better bolts
Decent canopy for the price. Could be assembled and fitted by one person if needed, however, using the bolts supplied is a fast track to frustration. I'm experienced in DIY but don't consider the fixing bolts to be fit for purpose. Do yourself a favour and buy decent shield anchor bolts and you'll be fine. Fitted two canopies to provide a bike shelter down the side of the house.
D**W
Easy to fit, cut to size, solid and a great price
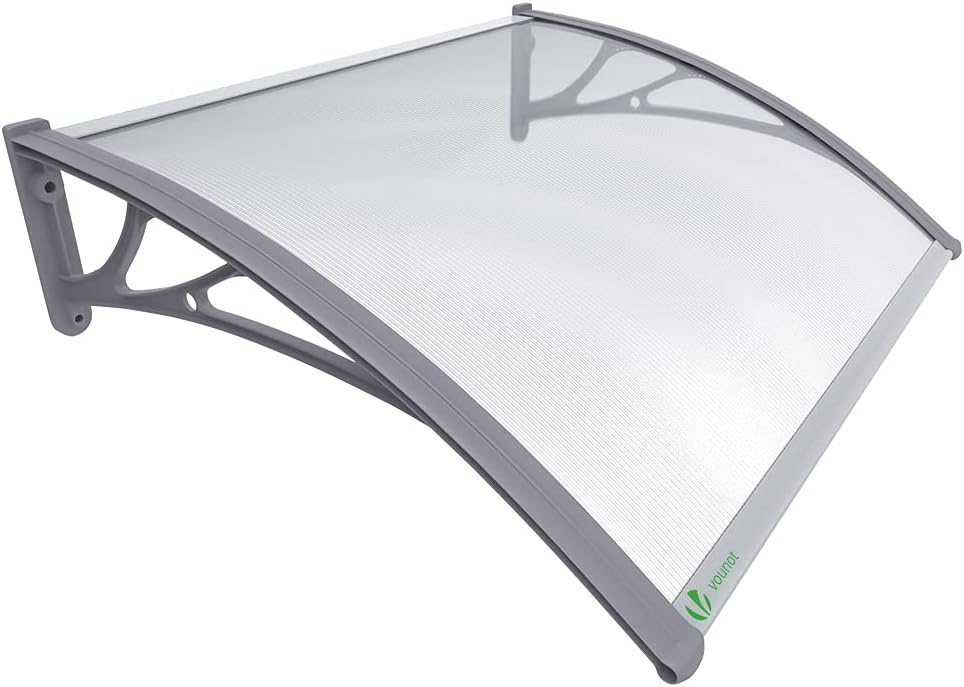
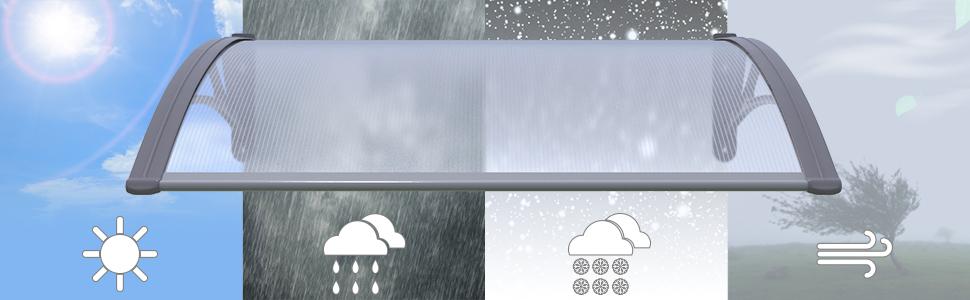
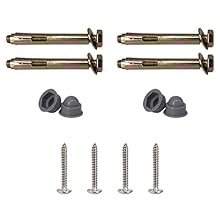
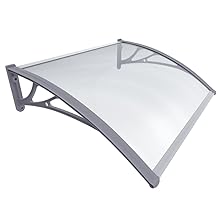
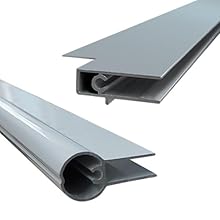
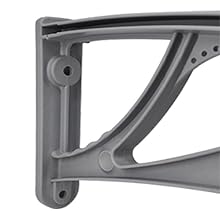
Having bought this without the forethought of “will this actually fit between my annoyingly placed drainpipes?”, I discovered pretty quickly that, no, no it won’t. Having said that, looking at it was nothing a tape measure a scalpel and a hacksaw couldn’t fix. It took roughly 20 minutes of cutting and assembly to get the finished item (more like 5 minutes without the cutting to size), and putting it up was a simple affair as it weighs next to nothing (I did require another pair of hands to mark the holes for drilling, but this took seconds). Not a fan of the supplied bolts so I opted for some hefty wall plugs and screws I have laying around. Stability wise it feels solid as a rock, I will update its wind resistance should anything unfortunate happen but am confident it will withstand some serious punishment. I like the way it looks, nothing too flashy but wouldn’t look out of place over most doors. Happy with this spur of the moment (due to the horrific downpours we’ve had recently) purchase. Quick and easy to put up, cheap, looks good, can’t really ask for more.
P**E
Good looking, well made and easy to fit canopy
Well made door canopy. Easy to fit. I did it by myself and it took about an hour for assembly and installation. Some people have complained about the bolts but I had no problem with them. They tightened up fine and the canopy is very secure. I am very pleased with it.
M**E
Flimsy plastic
Arrived quickly. Was easy to put up but only lasted a couple of days as the wind ripped it off the wall leaving the bolts in the wall so not great at withstanding strong winds
T**H
Looks great sprayed anthracite + fitting tips (2hrs)
Needed a cover down the side of the house this was the perfect width and height. Fitting it together is pretty straightforward but weirdly there are no fitting instructions, only assembly instructions. Took me approx 2hrs in total and I am not a prolific DIYer by any means. You need: a half-decent drill, 6mm bit (ideally), 10mm bit, spirit level, marker pen, hammer, ratchet spanner But here are some tips: 1. Spray the light grey brackets an anthracite colour. Then obviously let it dry before assembling. Personally I think they look much better than light grey (black may be fine but possibly too dark). 2. Assemble the whole thing first before even thinking of fitting the brackets on to the wall. 3. It definitely helps having an extra pair of hands to hold the last bracket as you fit the curved roof section onto it as you’ll need two hands to bend the roof. 3. Fitted on a brick wall I used the mortar lines to see if it looked horizontal 4. With another person holding it mark all the lower holes with a marker pen 5. I found the width of the instructions the exact vertical distance to the upper hole so marked them using a spirit level 6. Use fellow buyer Martypants’ advice of WD40 on the screws to prevent any chance kf them threading or getting stuck 7. Screw the end fitting to the bolt - if you don’t thee is a chance you will lose it in the wall 8. Hammer a nail in the wall first to make an accurate drilling mark 9. Use a 6mm masonry bit to drill the hole depths (the lower holes are shorter than the upper holes) 10. Then use a 10mm bit to drill out. Try not to go over 10mm (see below) 11. Place all the bolts through the bracket holes and position them in (another person helps here) 12. Push the bolts in and then gently tap them in 13. Screw all the bolts in with a ratchet spanner - the middle one is a pain as you don’t have a huge angle to work with but persevere! The end fitting slowly moves up through the bolt casing inside the wall pushing it outwards thereby ensuring a good firm grip so try not to drill any more than 10mm wide! 14. When sprayed anthracite I didn’t put the plastic bolt covers on as the bronze bolt covers looked auite good against the dark grey. 15. For a complete finish add a non-removable wall anchor if securing bikes and solar-powered security lights
K**N
Good quality product
Great piece of kit. Easy assembly and fixing.
S**A
Voll begeistert!
Schnelle Lieferung. Gut verpackt angekommen als ein großer Karton. Leicht, gut verarbeitet. Lässt sich schnell und leicht zusammenbauen. Sieht toll aus! Wir haben das Vordach gekauft um unsere Möbel auf der Terrasse vom Regen ( und von den Nachbarn von oben) zu schützen. Angebracht haben wir es an der Seite vom Balkon. Den ersten Regen hat es schon überstanden und es ist nichts durchgesickert. Wir sind sehr zufrieden mit dem Kauf.
A**M
Goed en stevig product
Inmiddels hangt het boven mijn voordeur voor enkele jaren en nog steeds prima. Goed product
A**.
Damaged item
Hi i have opened this product today to fit it and the sheet of it is damaged from both sides and the corner is damaged top
A**I
لا شي
ممتازه
J**D
Très bien
Très bien. Facile à monter. Je n'avais pas pensé au fait qu'il serait placé haut, j'aurais dû prendre un auvent plus profond
Trustpilot
3 days ago
2 months ago